Peter's Reviews -CrazyTalk, WebsiteX5 - Fascinating Tech Magazine Archivee
Main menu:
Peter's Reviews -CrazyTalk, WebsiteX5
Archived Issues > Spring 2016 Issue
In this issue Peter Moore walks through setting up a WebSite with the free version of WebsiteX5 available for our readers. He also reviews CrazyTalk 8.
If you want to try WebsiteX5 for yourself just click this link.
Creating a Website using Incomedia WebSite X5 Home Edition
Peter isn't a professional Website Designer but an amateur maintaining a few club and society sites, which makes me him the perfect target audience for WebsiteX5 home.
Website X5 is designed to allow anyone to create a great looking website with no previous experience or knowledge of HTML code. To see how effective it was I set out to recreate a basic website that had previously been constructed using a HTML code editor.
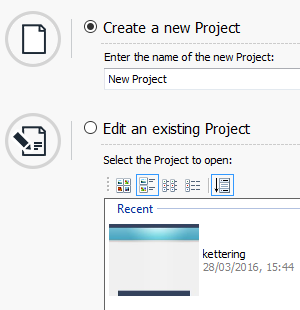
Starting the programme brings up the initial screen which includes a video tutorial which while covering some of the basic operations does include many features not available in the Home edition. Clicking on the start button at the top corner of the screen starts the website creation process with the Project selection screen where you can create a new project and give it a name or continue working on one that has previously been created.
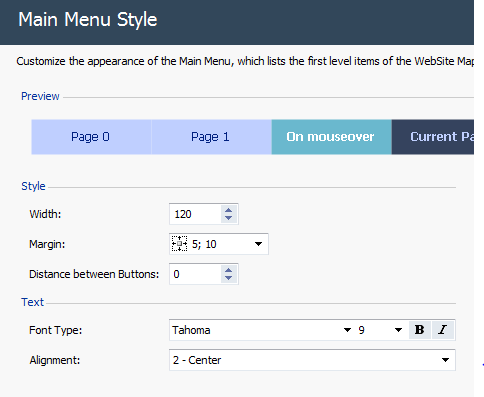
On the following General Settings screen enter the website title and the name of the person or organisation that is to be named as the author of the website, and in order to ensure that your website is included in search engine results provide a clear concise description of the subject matter. The URL address where the website will be located when published on the internet should also be entered. As the Home edition does not include any web hosting you will need to make your own arrangements. If you are not sure on any entry, go to help/summary where each item is explained in detail and also check out the options under Save. After completing the page move on to the Template Selection screen, with Home edition the only option available is to pick Default Template and from the list shown select the template that will best display your content. Now move on to select the style for your template including colours and fonts for menus and sub menus remembering to use the preview button to see the effect of the changes made. A return can be made to these screens if further refinement is needed later.
The template customisation screen allows you to personalise the header and footer which will appear on every page of your website. Use the toolbar at the top of the window to insert any images required either from a file or from the online library and position/resize them as required. Insert the title of your website and any header text required then adjust the font size/position and set any special effects needed. Click on the footer tab and enter any text or image required then click on preview to see the appearance of the website.
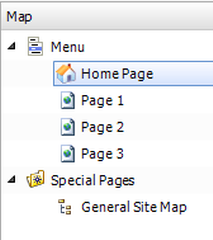
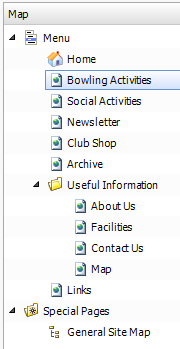
The next step is to create the site map. This is where you define the structure of the website, add pages and set page levels remembering to make it as easy as possible for a visitor to navigate through the site and find the information that they are seeking. Initially the structure will be as shown on the left, use the controls to rename and add pages, and set any sub menus as shown on the right. The names that are given to the pages will appear on the website menu. The website description provided for search engines given in General settings applies to the Home page, if you need to add a description for an individual page this can be done through the Properties tab.
If your website hosting requires the use of a particular file name for the first page e.g. index or default then you can change the file name of the home page in Properties without changing the menu label. Alternatively you can create an entry page with the required file name later in the process.
Finally comes the creation of the individual pages that make up the website. The page is divided into a grid and to create the required areas, rows and columns can be added and cells joined together. To add content to a cell drag the required icon onto the cell, double click it and enter the required content. If the icon for the type of object required is not present click on the manage objects button and import the desired object When complete click next to repeat the process for the other pages. Now move on to the Advanced settings where you can set a privacy message, an advertisement or an entry page. The entry page allows you to display an image, video or animation for a set length of time before the home page opens.
Finally the finished website can be published on the internet or exported to a disc or the project folder saved to a file.
Original Website

Equivalent Website Created by WebsiteX5 Home Edition
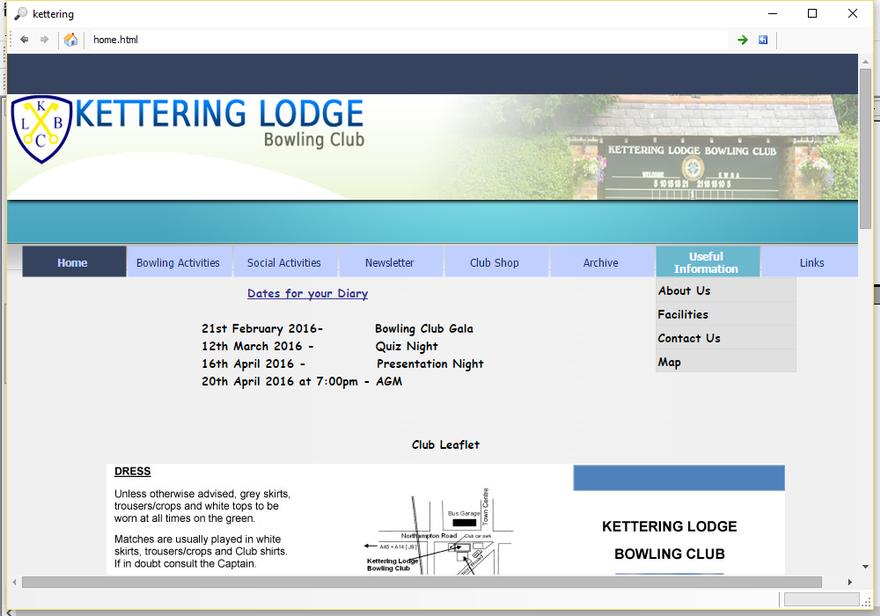
I found recreating my original website very quick and easy and in fact I could also see how it could easily be improved using WebsiteX5. It is not an exact replica but no doubt if I had been prepared to spend more time finding a better template etc. it could have been a closer match. The website does, however, perform exactly the same functions and is easier to modify than my original. I will certainly seriously consider using WebsiteX5 to improve my current and future websites.
CrazyTalk 8 Pro by Reallusion
TrulyFascinating Award Winner

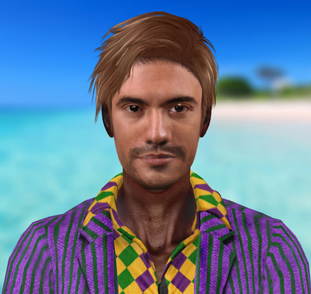
Reallusions CrazyTalk 8 makes a giant step forward from version 7 by introducing the ability to create 3D talking heads from either your own photograph of a head, a picture, or from one of the standard heads provided.
There are three versions of the software available, the Standard edition which will create a 2D head from a photo, the Pro edition that will create both 2D and 3D heads, and a Pipeline edition which adds the ability to export to iClone 6. A full comparison of the editions can be found on the Reallusion website.
This review will focus largely on the main new feature i.e. the production of a 3D head.
I had intended to load the software onto the desktop computer that had been used to test CrazyTalk 7 but an error message informed me that CrazyTalk 8 will only run on 64-bit machines. While I am aware that computers sold these day have 64-bit operating systems there must be many older 32-bit machines still in use, so remember to check the system requirements before upgrading.
 The Head Creation Process
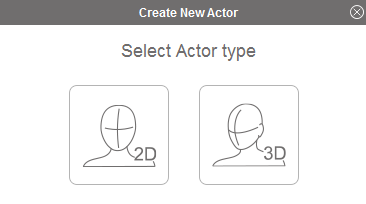
The first decision when creating a new actor is whether it will be a 2D or 3D type and this will lead to the appropriate route to create the actor. A head image must now be provided either from a photograph or by using one of the sample images provided.
As CrazyTalk now works in high definition the image provided should be of a high quality to allow fine details of skin textures etc. to be observed and adjusted. The image provided should also conform closely to the examples given to obtain the best results.
If a 2D head has been selected the route then follows a similar but updated path to that in CrazyTalk 7.
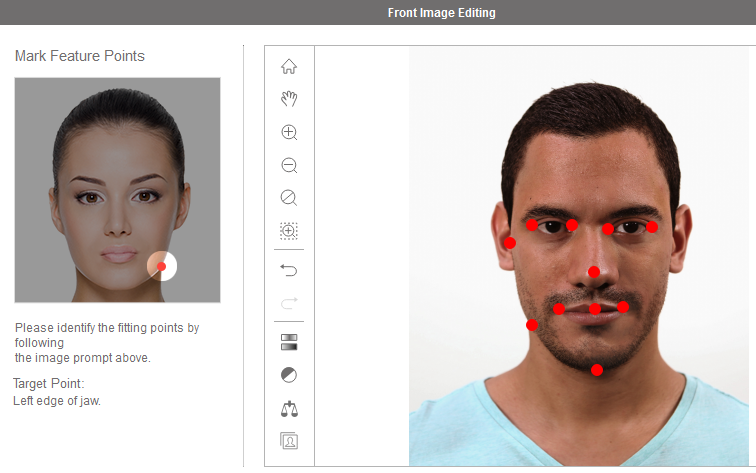
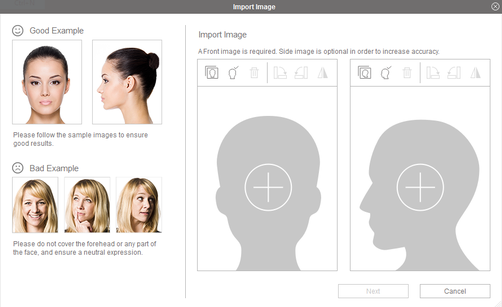 Whilst a 3D head can be created from a single front image it is better to include a side image, if available, as this will help to create a more accurate initial 3D head as well as giving more options later during the texture blending process.
The process starts in the usual way by marking the key facial points following the on screen guide.
On the following screen the key points are marked on the side image.
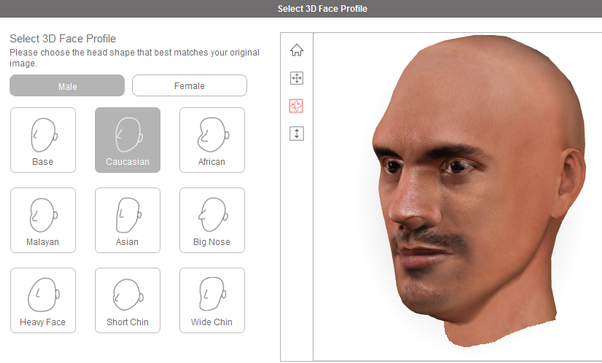 CrazyTalk will then produce a 3D head based on the facial key selection points provided and now presents an opportunity to modify the head shape based on sex and factors like ethnicity. The selection of sex is important as if ,say, female is selected it will not only lead to more delicate smoother facial contours but will also affect choices offered later in the process. You will have noticed that the default head produced is bald as opposed to a 2D image which does retain the original hair.
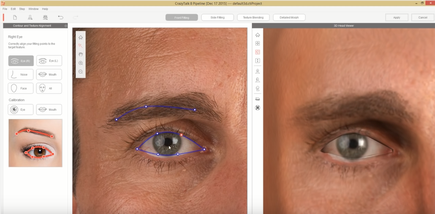 The following screens allows for further refinement and calibration checks on the 3D head.
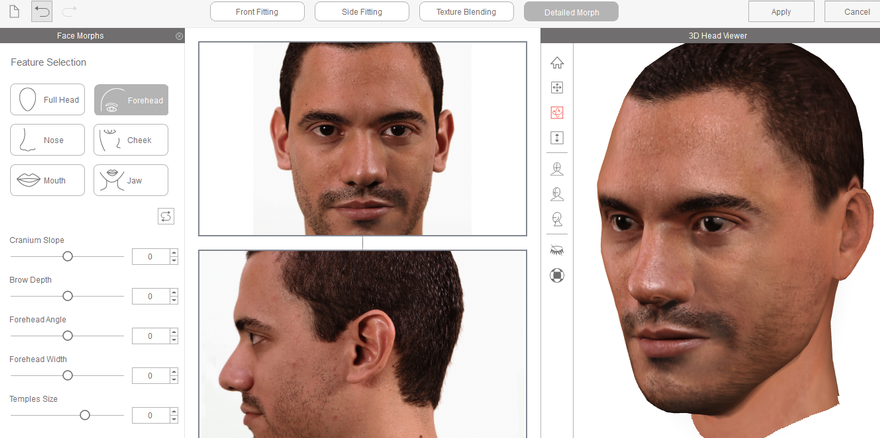
The first two tabs allow for adjustment and calibration checks for the front and side facing images either to create an accurate representation of the original photograph or, remembering that this is CrazyTalk, to modify the features as you see fit.
 On the fitting screen for the face and nose there are a number of light coloured zones which are used to further modify those areas of the image.
Having a preview screen alongside the calibration window allowing the effect of any change to be seen as it is made massively assists the process. It is especially useful as the preview head can be rotated to see the full effect from any angle.
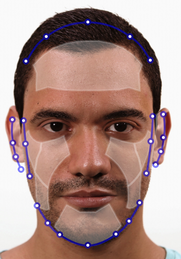
The third tab allows adjustment of the skin texture blend.
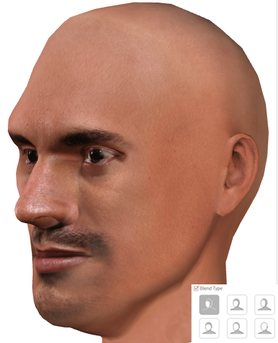
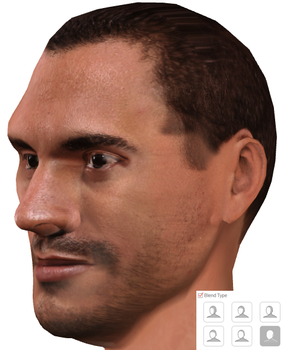 Six basic options for blend type are offered each utilising more or less of the original images; the final option includes the scalp allowing some hair texture to appear. Other options include modifying the skin colour either by sampling from the photo or picking an alternative skin colour, and adjusting the pore size and skin roughness.
The last tab is used for the final detailed morph of the features and here there are endless adjustments to create sunken cheeks, ears that stick out, modify a cleft chin it is all available.
Finally when you are satisfied with your creation click apply and your actor will appear ready to be brought to life. The actor will have a head and shoulders all of which can be animated. If the actor needs further refinement the head fitting icon on the project toolbar will return you to the previous screens.
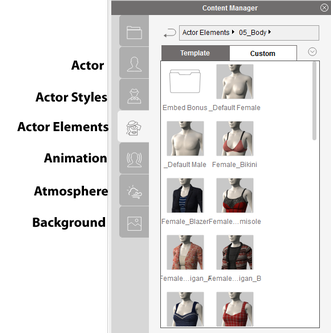
To change the eyes or teeth the quickest route is to click the appropriate icon on the project toolbar which will automatically open the settings dialogue box while a selection or eyes or teeth will be shown in the content manager. The background and lighting can also be changed through the content manager
 From here on the production process follows a similar route to CrazyTalk 7 although there are many improvements and additions such as “auto motion” and “look at camera”.
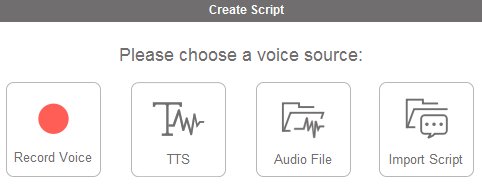
An audio script is created either by recording a voice, using the Text to Speech Editor or by importing an audio file or CrazyTalk script file.
Auto Motion can now be added allowing the actor to move and lip-sync or listen as the audio script plays. Full control of the animation and facial puppet is by means of the various setting screens and the timeline.
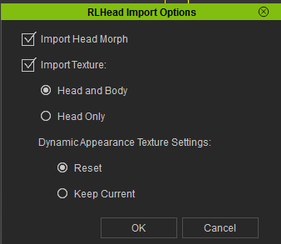 The Pipeline edition does include an option to export the created 3D head to iClone Character Creator.
 Choosing File, Export, and Send Head to Character Creator starts the process. The file is validated and saved, Character Creator is launched and the import options window appears. Make the selections and your 3D head is ready for use.
The export process is simple to use but I did find that I had to update to the latest versions of iClone and Character Creator first.
Conclusions
CrazyTalk8 Pro marks a significant step forward in the evolution of this software with the ability to create 3D talking heads and if you have chosen the pipeline edition, to export them to iClone. I found the head creation process very straightforward and the addition of the preview screen when creating 3D heads, which allowed the effect of any adjustment to be seen instantly from any angle, was a major innovation. When creating a 3D head from a photograph the hairstyle is lost and if this is important it may be better to make a 2D head rather than using one of the supplied hair styles.
Three editions of the software are available and it should be noted that the Standard Edition does not give the ability to create 3D heads. Although the head creation process is straightforward, there are many tutorial videos and an online help manual which includes many useful tips and keyboard short cuts.
I enjoyed using CrazyTalk 8; it was fun to use and gave good results in a very short time. I would have no hesitation in recommending this product.