Gifts for Fun 2016 - Fascinating Tech Magazine Archivee
Main menu:
Gifts for Fun 2016
Archived Issues > Winter 2016
 We all need to relax sometime. People find all ways to relax but many like to be creative in their spare time. Be that by creating family websites or creating digital artwork. Others just want to mess around with a crazy gadget or two.
XYZ Printing - 3D Handheld Scanner
By Peter
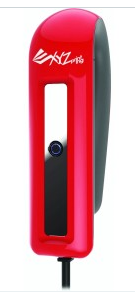 This 3D scanner is a small, lightweight, easy to use handheld device which quickly produces a 3D image file from a physical object. By using the supplied software the digital replica can then be modified, resized and sent to a printer.
 So is it really so easy to use? First you will need to check that your computer meets the required specification and then load the software and drivers which are supplied on an SD card. The cable for the scanner must then be plugged into a USB 3.0 socket.
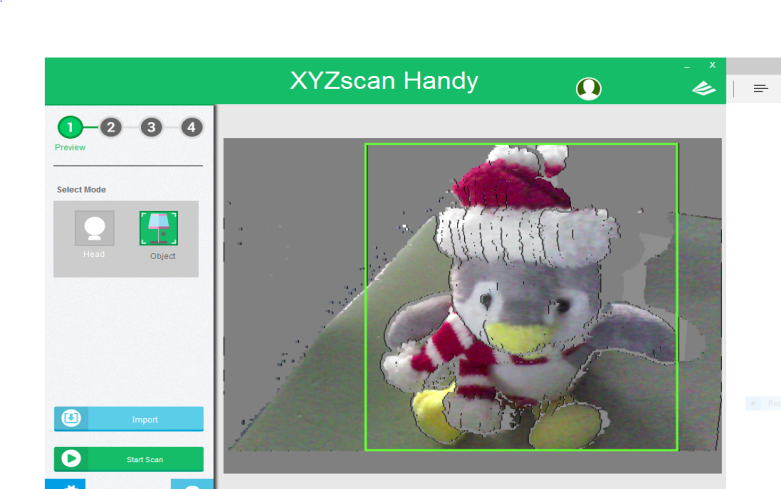
Run the “XYZscan Handy” software and on the initial screen you have an option to view tutorial videos or to move onto the scanning screen.
There is an initial screen containing basic instructions which can be turned off when no longer needed.
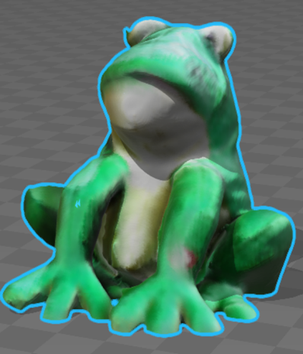
On the scanning screen select between head or object mode then holding the scanner horizontally in the left hand move the scanner to focus on the object. In Object Mode move the scanner until a green frame appears around the object to be scanned, in Head Mode just focus on a prominent feature. The scan can be started by pressing the button on the scanner or from the screen. After moving around the object to record it from all angles, stop the scan and check the processed image. The saved file can be further modified using the XYZmaker software, or use an alternative such as 3D Builder which comes with Windows 10
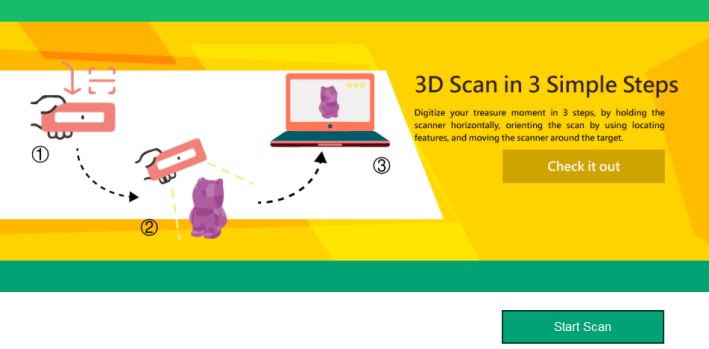

The instructional videos suggest holding the scanner in the left hand, the computer in the right while moving round the object to carry out the scanning. This does require some practice, but personally I found it easier to rotate objects on a turntable while keeping the scanner still. Reflective, metal and transparent objects are difficult to scan and may require coating, and I certainly experienced difficulty scanning a black and white toy panda.
Overall the scanner works well and being light and portable is very convenient to use. Powered by Intel Real Sense, the scanner proved to be fast in both scanning ability and processing speed. Even without access to a 3D printer the scanner could prove useful, perhaps to digitise favourite toys so that they could be viewed when out and about. There is always the option to make use of one of the on-line 3D printing services which may give the option of a wider range of printing materials. Priced at about £117 the scanner would make a very acceptable and useful Christmas present.
Those important Specifications Data Interface: USB 3.0 Operating System: Windows 8.1 and above (32-bit and 64-bit) Microsoft .NET Framework 4.0 above
Minimum Hardware 4th Generation Intel® Core™ i5 Process (PC) Requirement: 4G RAM Basic (8G RAM Recommended) Full Specifications can be found at: http://us.xyzprinting.com/us_en/Product/3D-Scanner#spec_single
XYZ Printing - Da Vinci MiniMaker 3D Printer
By Peter
No sooner had I reviewed the 3D Handheld Scanner than I was lucky enough to find myself reviewing a 3D printer giving me the opportunity to follow the process through from the initial scan to the final printed replica. The printer in question was the da Vinci MiniMaker produced by XYZ printing, which is a reasonably priced device aimed firmly at the educational and mass market.
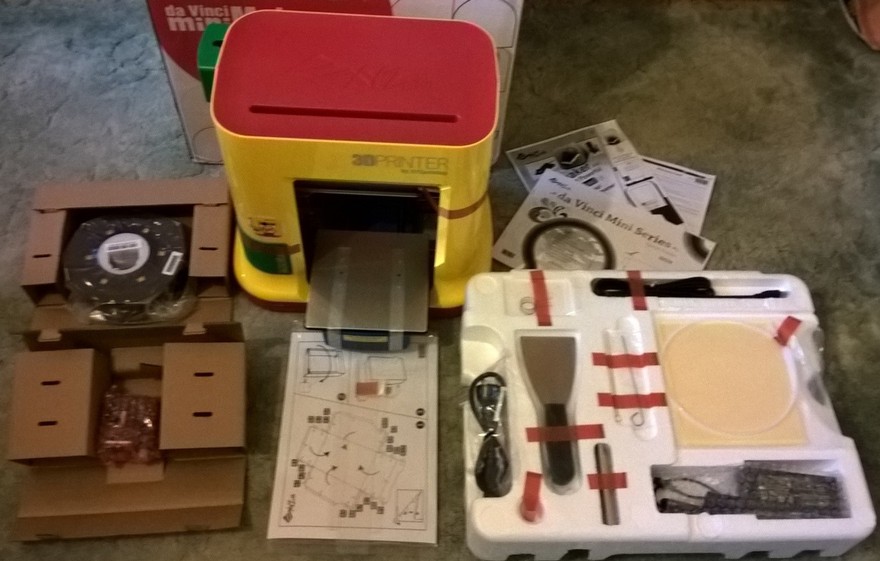
Opening the box one is at first sight confronted by a bewildering array of parts and a look at the quick guide was not particularly reassuring. However, on the XYZprinting website there is a short video entitled, “da Vinci Mini Series Unboxing” which soon shows that it is only a matter of minutes to remove the packing pieces and install the extruder head and guide tube ready for operation. To ensure that the model remains firmly in place during the printing a special paper is supplied that must be stuck onto the print bed.
A second video “da Vinci Mini Series-first-time printing & XYZware introduction” will guide you through the remainder of the process from loading the spool, downloading the software, and producing a 3D object. The software provided works well allowing you to load and modify the object to be printed.
The layers required to build up the model are examined and if large overhangs are detected thin supports will automatically be inserted where necessary. These can be removed from the finished model with a sharp knife. When you have selected any other options such as the required density and quality, the file is ready to be sent to the printer. Connection to the printer can be either by the USB lead supplied or by Wi-Fi.
Printer functions can be controlled by the software from loading/unloading filament to monitoring the status and progress of the print.
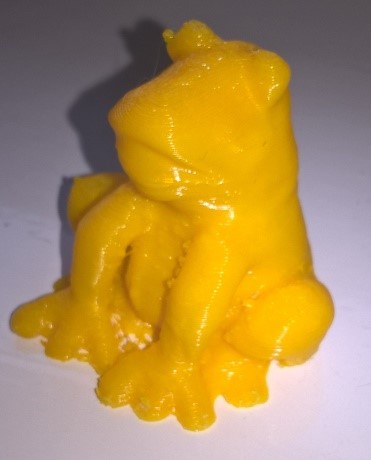
I certainly found the printer to perform well and starting from using the XYZ handheld scanner to create a 3D file through to the final printing was straightforward.
Original

3D Image
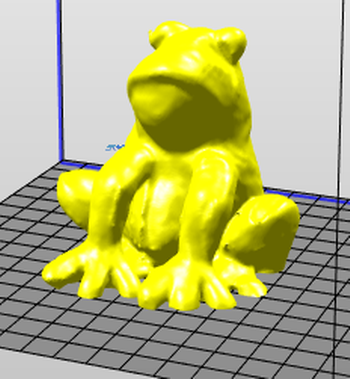
In XYZware Program
Final Print
The XYZmaker software provided is specially designed to make it easy to create your own designs or alternatively there are numerous 3D object files to be found online from toys and games to spare parts for various pieces of equipment. It must be remembered however, that the PLA printing material is biodegradable so while a spare basket wheel can be printed for a dishwasher it can only be regarded as a temporary repair. The extruder on this printer is only designed for use with PLA so alternatives such as ABS cannot be used.
The extruder does get very hot and it is important to keep hands clear during printing, a thin transparent sheet is supplied that can be folded into a box that can be taped to the front of the machine but it is flimsy and could not be regarded as childproof. Given the fascination of watching the model build up layer by layer this is an area that does require improvement especially as the back is totally open.
The printer does generate a certain amount of noise in operation which may extend for a number of hours. This may be acceptable in a domestic environment if one can keep the door to the printer room closed but is unlikely to be acceptable in an office environment.
It should be noted that there are some maintenance requirements, mainly in regard to occasionally cleaning the extruder head. Given the printers potential use in educational establishments it is designed to only accept XYZ brand PLA filament as this has been tested to ensure safety for both the user and the environment.
Priced at about £300 the da Vinci MiniMaker printer is good value as a starter level printer for use in the educational or home environment, but if you require a more enclosed or quieter printer then you will need to look at alternative models. With the variety of 3D object files that can be found on the internet or created using the XYZmaker software the printer should give endless hours of creative fun.
Magix Music Maker (Live and Premium)
By Richard
Introduction
Aside from a brief flirtation with Garage Band, I’ve had little to do with production tools since plugging a MIDI cable into my Atari 520 ST or putting together a backing track for a particularly badly programmed Amiga 500 sprite demo. I was therefore interested to see what Magix was offering in the relatively inexpensive Music Maker product line.
For the purposes of this quick look review, there is little to differentiate between the Live and Premium editions (certainly in terms of user interface.) The Premium edition offers 8000 sounds and loops (up from 6000 on the Live edition), 12 instruments (up from 9) and 12 Soundpools, combining sounds from a particular musical genre (up from 8.)
The Premium edition currently costs an additional £20 more than the Live Edition, and is worth the extra since you are likely to find yourself quickly making expensive purchases in the Magix online store when you find the instrument you need isn’t part of the edition you purchased.
User Interface
The track-based interface is instantly familiar, providing the ability to drag instruments to tracks and either record fresh rhythms or use the tools to build a framework from which to work. Using the Song Maker function, I was able to quickly put together a template that I could then customise using the huge variety of effects and creation tools. I was also able to start a little more from scratch by selecting from one of the Soundpools on offer (for example, Latin) and then pasting together the complementary instrument loops to create music.
The user interface does suffer a little from not being fully DPI aware, which can make some dialogs hard to see on a high DPI screen. However, on a physically large screen this should not be a problem – I did see some issues on my 13 inch Dell XPS 13 display. Surface Studio owners should be fine.
The interface is also supposedly more touch aware. I found this a little hit and miss in practise – when attempting to play the keyboard on one track, I found that getting the application to recognise more than 2 simultaneous presses impossible. Again, this might be more to do with the physical size of my screen, and I would think that anyone serious enough about their music is likely to have invested in an external keyboard anyway. However, the screen keyboard does pack a useful feature where it only plays notes in the selected key, which is useful for ham-fisted players like me.
At a technical level, Magix have elected to go their own way with interface design, eschewing standard Microsoft dialogs for their own custom versions. This serves little purpose for end users other than to steepen the learning curve.
Audio Effects and Imports
As well as the array of audio effects you would expect (reverb, filter, distortion and so on) it is possible to add additional effects through VST2 and VST3 plug-ins, which greatly extend possibilities along with providing a gateway to professional level compositions. Which is not to say that the output from the stock offering would not be sufficient for the vast majority of projects – it certainly is!
A number of effects suites are also provided on top of the studio effects. The Vintage suite apparently allows for a ‘retro’ sound, although I found it to be a little hit and miss in practise (sometimes ‘retro’ can just mean ‘not very good’ in my hands) while the EssentialFX suite was great fun, particularly the Flanger. The use of effects is a personal taste thing, and the vast majority of tastes are catered for here.
Recording your own instruments is straightforward, and once recorded, the segments can be tinkered with using the studio tools. Vocals may also be captured with the audio shown as waveforms that can be ‘corrected’ for when the tune has been just that little bit too hard to capture…
Finally, the functionality is extensible with additional Soundloops and instruments being available through a store within the application. Most range from £20 - £25 and give a preview of what to expect before purchase. As with the content of the core package, the content of these add-ons is impressive, with high quality audio. However, things could expensive as you search for that perfect sound.
Sharing the Songs
Once tracks are created and mastered, Music Maker supports a large number of formats including the ubiquitous MP3, along with the likes of OGG Vorbis, FLAC, WAV and so on. Audio may also be uploaded directly to services such as SoundCloud, YouTube or Facebook.
Conclusion
The Magix Music Maker line is impressive, and provides a bridge from amateur to professional. The tools make it straightforward for an enthusiastic amateur to create some impressive compositions, and the extensible nature of the functions means that the studio can grow with you. The Premium edition represents better value than the Live version and, with the inclusion of 1 year of upgrades in both packages, I have no hesitation in recommending this for the musically inclined.