Welcome to FascinatingHome's 2015 Gift Guide.
These might be gifts for the holidays (or Christmas as we like to say in the UK) or for yourself in the sales that seem to follow ever quicker each year.
Whatever the purpose these are some great things to help and entertain around the home.
Firstly, Ruth takes a look at a venture into the world of tablets from Children's Educational Toy manufacturer LeapFrog
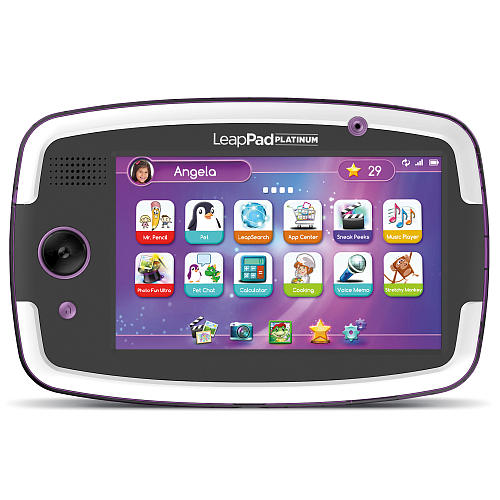
LeapPad Platinum Tablet
This 7 inch tablet is aimed at children aged 3 to 9 years of age. It holds 8GB of data and comes with some included games.
Your child can connect to wifi and chat to their friends. There are over 500 games and ebooks which have been approved by educators that you can add to the tablet for a fee!
It has a shatter safe screen to protect for rough and tumble that is bound to occur.
It comes with the following built in apps:
Pet- This is Pet Pad Party which you create and name your own creature and you can care for your pet and play games. The games are started by identifying number s or answering maths questions for the wash a pet game. The rewards gain you access to other rooms and if your parents have connected you to the web then you can access the reward store to acquire these rewards. I did find that this did not see my internet network as I have the modern 802.11n standard but it was able to see the older wireless networks.
You can also play games with a friends pet too.
Pet chat is an online chating app that lets you connect with friends in the same room. You can click pre-set words to send to your friends.
Scout and friends is a game that lets you work out what emotions your pet friends are feeling giving your child a choice of how the person feels and how you should do to help such as say a choice of happy sad silly and then a choice of how to respond to things such as a bone dropped in water should your child ignore their friend, listen to their friend or share a treat with their friend. This can lead to games such as catching milk bottles.
There are demos of the human body app that you can fight infection but done in a lovely simple way so your child is is learning simple words such as plasma, oxygen, and all about red and white blood cells and all while playing a game. A good way to learn biology and fun.
Stretchy Monkey- teaches history through games and lets your child sort them into the right time period.
It comes with built in cameras and can video and you have editing software to add comic effects to the images you have taken.
There is a music app with two albums already in. You have leap search for internet searching in a safe way for your child and a notepad, clock, calculator and calendar. The clock shows the time and tells you the time so it is a good way to learn the time. It also has a stop watch.
The notepad app brings up a keyboard so notes can be typed and a tick saves them and the x deletes them.
It also includes 3 imagicards and a demo of the game
So you have several apps that your child can play before you as the parent have to spend any money.
As parent you create a parent lock and this enables you to set the age so as your child gets older you can change the age range so the questions get harder to let them get to treats. You as the parent decide if they have access to wifi or not.. You can set time limits which can be important when you are trying to get homework done!
A good educational tablet which lets your child learn through play. What I like is the included apps so they can start playing straight away but as a parent you may want to charge the leappad before handing over at Christmas or birthdays so they can play straight away.
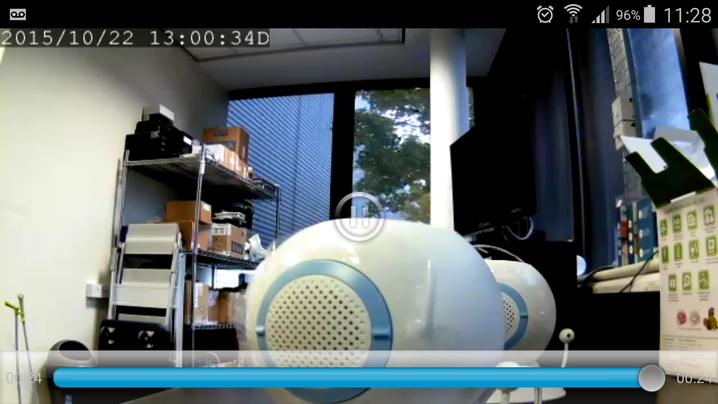
After the adventures we had with Wayne's dog reviewing the Sphero and Action Cams a few issues back we thought Wayne would be the perfect candicate to review Dlink's new pet cam. Which he was... but he takes hi review a slightly different direction.
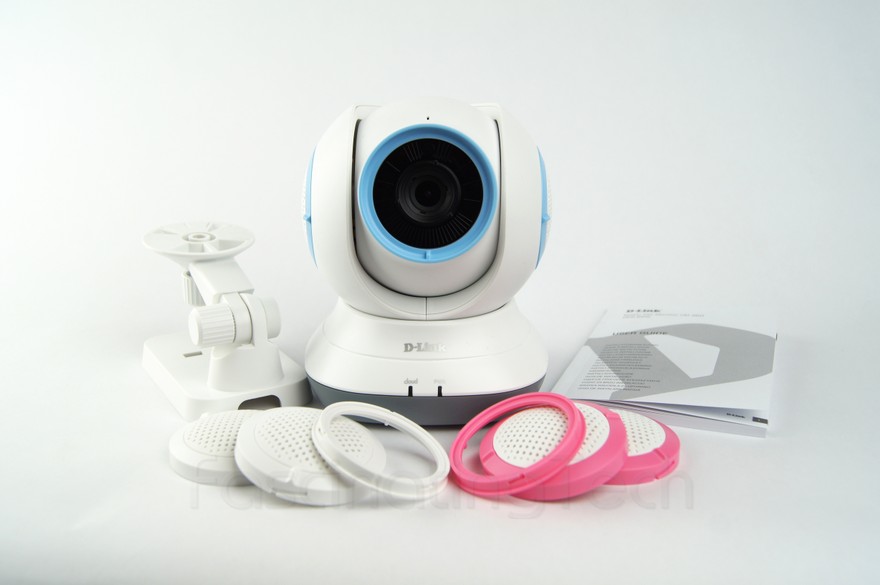
Dlink 855L/P – Networked Camera
The camera is a (very) sturdy portable device with its own WiFi connection enabling you to tether to it directly from your mobile device and control the cameras settings, or to access it via the internet to get a live stream. The overall quality is good with the ability to capture images and video based on movement, sound, or temperature fluctuations being very useful. The included 16GB memory card was very welcome addition (as some competitors come with less or even none).
The only let down is on the user interface (both mobile device and web based) – layout of the controls and the controller options could do with a little work.
Apart from that minor issue, it is a consumer level device that will find uses around the home for monitoring animals and children, to generally keeping an eye on your property.
Links
Looks
Like my Casio watch(see review below), the 855L is (quite) big but understated. Unlike my watch, the 855L comes with interchangeable covers for the lens surround and the side pieces (in Blue, White, Pink), and a sticky-out temperature sensor at the back. The overall impression is of a cute techno-animal with a tail, which was possibly emphasized with the device primarily being marketed for pet and baby monitoring and needed to be non-threatening or scary.
The main lens housing is quite large, containing a pretty decent optical element, surrounded by infra-red emitters that the lens can pick up and the innards process. This is housed in a spherical main body which sits atop of a rounded rectangular base. All smooth corners and curves, and made of tough plastic.
It would not look out of place in any baby’s room, but may even be distinctive \ visible enough to deter intruders if that is what you are considering it for (IE, deter by making it obvious the place is being monitored).
Above the main lens is a light sensor that flips the between normal light recording to infra-red, and above this is a small microphone that can pick up sounds for storing on the SD Card.
Either side of the lens housing are covers that provide access to the SDCard (it comes with a 16GB card pre-installed) and a speaker to play (pre-installed) lullabies and out of.
The bottom of the device hosts a couple of small LEDs on the front (Power and Cloud Connection) that are visible but do not shed a lot of light into the room – Useful if monitoring a baby room (for example) where bright lights could distract the baby.
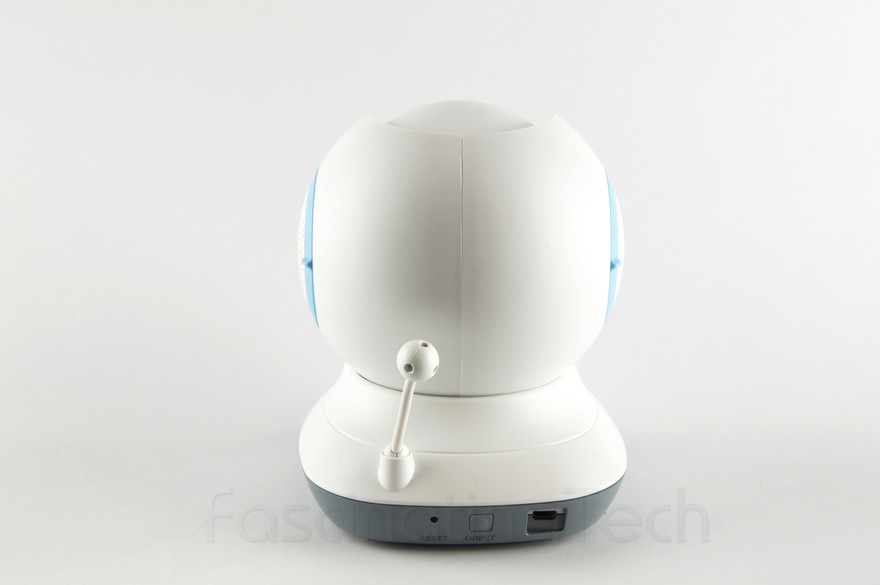
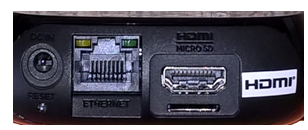
At the back of the base are the:
· Micro USB port (for connecting to the mains via supplied charger) or a USB battery pack,
· Direct connect button (for easy connection to home WiFi)
· Reset Button – Used when WiFi connectivity problems occur– Twice during review.
Device Functions
The lens housing has 4 degrees of movement – Pan and Tilt – Allowing the camera to view almost 360 degrees horizontally and 90 degrees vertically. Movement is very quiet with just a small hum as the lens moves around and which is unlikely to distract a baby or pet when in operation. From about 5 feet away it was fairly unnoticeable.
The optical sensor was able to pick up smallish movements, again possible enough to filter out normal background movement, but we were unable to test the limits of this. One thing we DID find on our device was that the movement capture area seemed to be a bit bigger than the optical range. Movement out of site of the visible area triggered the camera to activate – Not an issue, in fact it could be considered a boon in some cases.
The lens could be refocused by using a tool that was provided, but during our testing, the “infinity” setting that appeared to be default worked fine.
The microphone was functional and able to pick up noises pretty clearly from about 10 feet away. For most uses any noise picked up would alert the operator so they could take the appropriate actions. During testing, we were able to make some noise before it triggered recording so it does have some tolerances – It will not start recording at every slightest noise.
The speakers were small but clear – The pre-installed lullabies came out clearly enough without distortion, warble, or wave, and depending on the setting should not cause alarm (more on that later)
The accent ring and side covers were easy enough to undo and replace by hand, and fitted back together easily enough too.
The temperature sensor was tough enough (a number of people enjoyed flicking it and making boing noises) and seemed to work fine. Moving a flame in front of the camera caused it to record, but we didn’t have the opportunity to directly measure the amount and speed of change to trigger it.
The reset hole can be accessed with a small screwdriver and tactile feedback was sufficient to identify when the button at the end was depressed.
The power cable that came with the device was plenty long enough and allowed us to position the camera in a number of locations during testing. The cable is of the twin braid kind and did tend to keep its kinks in place – When fitting in a room (semi-permanently or otherwise) it would need to be taped down or run underneath carpets etc to stop it being kicked to cause a trip hazard
WiFi \ Mobile connectivity
The camera is controllable via the DLINK camera app that is available for iOS and Android. The current listed versions of compatible (Android) devices is quite small, but forums do consist of messages from users that have used it on non-listed devices fine.
I found that it would not connect using my Nexus 6P, but connected fine with my Samsung Galaxy S3.
The issue with the Nexus connectivity may be related to enhanced security in Lollipop, or even the device, but even after allowing connections, and disabling blocks, the Nexus still refused to connect.
The Samsung connected 2nd try – The first attempt failed due to me trying to connect over the cloud rather than directly tethering to the camera.
When powered up the camera generates its own WiFi hotspot allowing you to tether to it with your compatible device.
Using the DLINK App, you start the application, select the camera model that you wish to connect to, and after your device scans round, you select the camera INSTANCE you wish to connect to.
Security appears to be good with each device appearing to have its own ID and Password. This information is printed on the bottom of the camera base (very small text).
If making use of the DLINK Cloud Storage services, any images and files captured by the camera and uploaded to the cloud can be protected by the user generating a DLINK account and only allowing access if they have the correct credentials.
For the testing we made use of just locally accessible storage although we did create an account to check out functionality.
Mobile Application
The mobile device application installed was MyDLinkLite Version 3.5.0 for Android, running on a Samsung Galaxy S3.
As my Samsung was an old device and deregistered on the telephone network, it was an excellent device for tethering to the camera.
On launching, the system shows a splash screen then a page where you can connect to your DLink account (to access files and connected devices), or to connect to a LOCAL device. If connecting locally, the system will list all remembered connections, and search for any nearby pre-configured devices.
Locating and registering a camera was quite straight forward but ensure that your OS and device allow connections to the camera – This was the issue on my Nexus where it was just not allowing connections.
Remember - You also need to connect to the Camera WiFi point in order to control it locally. Again, this is where the Samsung worked well as I could tether \ connect it to the camera and leave it connected for as long as I needed.
Application wise, you are able to change device and some account settings, read up on how to use the device (requiring internet connection) and check the application version number.
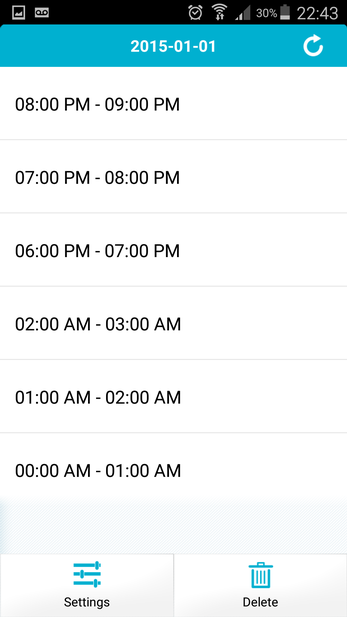
You can jump to and access the content stored on the device which are listed as a series of folders based on date, then sub folders based on the hour (8pm – 9pm, 9pm – 10pm etc…) However, on my device, the date time kept resetting to 01-Jan-2015, and no options on the web application or the mobile device would let me reset it – This became very confusing and not a little frustrating when I tried to find files related to the testing. What caused additional issues is that the device I had also contained images from the DLINK testing lab – Again, listed as 01-Jan-2015, and in similar sub directories. I am hoping that this was just (a) an issue with my device or (b) something you can correct somehow, but an option on the application to force a date \ time check, or enter one manually would be welcome.
Web application
Not a lot to say here except that it becomes annoying that in 2015, on a 1920 x 1080 display, the preview screen still comes with scroll bars… especially when the maximum resolution of the camera is 1280 x 720. A small change to the display layout would make the whole image visible.
Controlling the device
Depending on the camera model connected to, the user can control additional settings such as
· Wake \ do not wake on temperature change
· Wake \ do not take on sound
· Wake \ do not wake on movement
You can also control the camera by previewing the live stream and moving the camera around by pointing on the screen. This was initially confusing as you are not pointing to where the camera should focus, but rather pointing to how far the camera should move. If the width of the screen equals the total range of movement the camera can turn, then tapping the left edge of the visible screen actually means “move camera to its left most position. After 4 hours use this still caught me out.
On the web based application, you can stream footage and also move the camera – The interface is not pretty and time spent on improving the layout would be welcome \ useful.
If fact, both the mobile and web based applications could do with a bit more work.
While streaming, both interfaces allow you to:
· Control focus of the camera
· Play sounds through the devices speakers
· Listen via the microphone
· Turn on \ off functions
· Pan \ Tilt
· Move to a position
· Change capture resolution
All as expected from this type of device.
Captured output
Photo quality is Ok – Colour images can be a bit washed out, or bleed, and depending on the lighting can suffer from some artifacts, but the black and white \ infra-red captured images are pretty crisp. The LED \ Emitters surrounding the camera throw a good distance and seem to ‘illuminate’ evenly. If the camera is at the end of a bed \ crib, it should pick up the image ok.
Video quality is Acceptable – No evidence of jittering or stalling while files are being written, but the captured footage does seem to flicker quite a bit – Just as if it was compressing a lot and subtle changes are being missed until it’s a noticeable change.
Sound quality was acceptable – The microphone is sensitive enough to trigger recording, but sometimes normal conversations a few feet away are a little hard to make out.
Overall, as a device to pick up activity and alert the user to an event it works very well. As a device for recording what was happening, its acceptable, and for something to record what was said, its passable.
In Use
My first attempt at using this was to record what my 10 year old Labrador was doing downstairs when I was upstairs reviewing products. After 30 minutes it became evident that the dog just fancied a lie down. On the settee. Looking out the patio doors. Even when my son came home, the lab just decided to lay there.
Second attempt a little later on… ditto.
Third attempt, later that night .. Action ! – The lab decided to move from the settee to under the table.
Ok – My dog is obviously camera shy – She will chase Sphero’s down the road, but won’t act for the camera.
Another opportunity came up later in the week – Friends of mine run a Paranormal Investigation Group – A not-for-profit group that visit various places that are renowned for paranaormal goings-on – And invite friends and members of the public to tag along. I am their official ‘unofficial’ photographer and have been going with them to various places for the last year or so. In this instance we were re-investigating a haunted pub in Theale (The Lamb Inn). It has been visited by a number of high profile groups over the years and this was my second with the team, and the fifth or so for the team members (as a whole). Interesting video and audio footage was captured in all instances.

The group were intrigued by the camera and its capabilities, with some in the group suggesting it could be a very useful tool for recording evidence in “alone-rooms”. For this we would set up some trigger objects (look it up), and leave the camera pointing at the scene. With the cameras ability to wake up and record autonomously based on
· Movement
· Temperature
· Sound
It seemed an ideal “place and forget” device. The 16 GB storage would have plenty of room for the 6 hour investigations (9pm – 3am) and being mains powered would mean that the device running out of power would not occur.
For instances where power sockets are not available, such as at Donnington Castle, the device could be connected to a USB power pack and still only draw big power when it was active. It is also big enough to be easily spotted out in the open (the two LEDs would also help spot it).
The team are still investigating the footage captured from the Lamb investigation, but it did power on at least twice when no-one was apparently in the room.
The Infra-red capture was really useful and illuminated the unlit rooms quite nicely. Quite a bit of detail was discernable.
Warning…
The only thing to remember is…. When investigating a haunted place, and the lead investigator is tired, worn out, on-edge, alone, and when they are most definitely, definitely not expecting it, do not accidentally trip the camera to start playing lullabies… at full volume… Did I say the device was quite sturdy?
Streaming media is becoming more abnd more popular. Peter takes a look at a very good streaming media player.
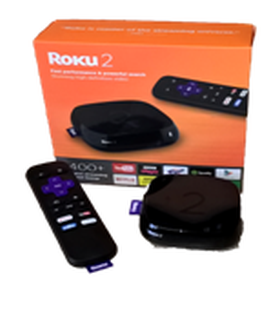
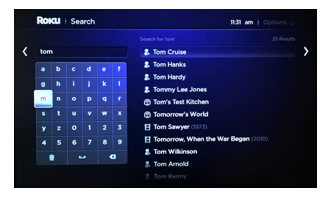
Review Roku 2 Streaming Player model number: 4205X
The Roku 2 allows users to easily view video channels transmitted via the internet on a television equipped with an HDMI port. These include all the usual TV catch up channels, Netflix, NowTV, Google play, YouTube as well as over 1400 other channels. Some content is free to view while others such as Netflix require a payment.
The box contains the small Roku streaming player, a remote control, and a power adapter. No HDMI cable is included.
Connecting using either a wired, or wireless network and setting up the player is straightforward and only takes a few minutes. My only concern was that you are required to set up an account which includes giving credit card details. With the recent hacking of customers details from websites I would have preferred not to give these details until I actually wanted to make a purchase. A pin number is used to prevent accidentally making a purchase. A microSD card can be used to expand internal storage for channels and games.
In 2015 the Roku 2 was updated being given the faster processor used in the Roku 3 and a new remote control. The remote includes shortcut buttons but there is no headphone connection for personal listening or microphone which is availabel on some of the more high-end Roku boxes.
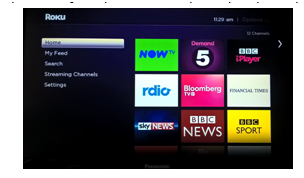
Once the setup is complete the home screen appears which you can customise with your favourite channels. Select a channel and the programme appears on the TV screen and you have controls that allow you to pause, rewind or fast forward the programme. I found the picture quality, which can be up to 1080p HD, to be very good when connected to a standard (4Mbps) wireless broadband network.
A search facility is available, simply start typing a name using the remote control, select the required name and information is given as to what material is available, on which channels it can be found and any associated costs.
Alternatively you can search through the Channel Store by genres, most popular, New etc.
There is also a Roku App that you can download to your phone that allows full control of the system and can also act as a an alternative to the remote. One useful feature is that the App allows you to play music or display photos that are stored on your phone through the TV.
I have found the Roku 2 to be very quick in operation and a most useful addition to my existing TV setup. I recently returned from a TV free weekend in my motorhome and in a few clicks I was able to catch up on the programmes that I had missed and then we could look at photographs that I had taken displayed on the TV with no need to pass the phone back and forth. The Roku could also find a use in a room where there is no TV point although not for live TV.
Conclusion
This is a genuinely useful device that will be used on a day to day basis. Prices vary but at the time of writing Amazon had reduced the price of this model from £69.99 to £54.99. This is one present that will not be put back in the box after Christmas.
Perhaps a few less people have a desktop PC at home than they previously did but it is still a suprisingly buoyant market and Wayne offers some tips on how he went about upgrading his own setup.
Wayne's New PC Setup
Apologies for the self-satisfied grin – After 4 years, my old PC started to misbehave – Files started going missing, Drives started to detach, a faint smell of ozone and a slight blue haze started to become more frequent… My old hand-built PC had finally decided to branch to a new address and go offline.
Maybe it was too much asking it to play Elite Dangerous with as many bells and whistles as it could, and then, when not in use, continually contribute to SETI… or maybe it was the music software, the editing software, and the stop-motion software becoming a bit too much to handle… or possibly, just possibly, it was me using those as excuses in order to purchase something newer.
Whatever the reason – I did buy something else. It’s not the best – but it’s the best for me at the moment.
Raw Specifications
· Motherboard Asus Z97-Pro Gamer
· CPU Intel i7-4790, running at 4.0 GHz
· Memory 2 x 8GB Crucial Ballistix Sport DDR3 @ 1600 MHz
· Cooling Standard Air cooled
Additional Purchased Components
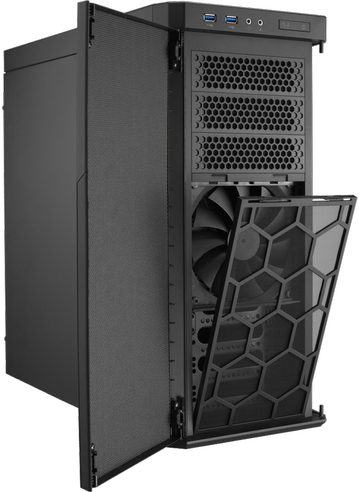
· Case Corsair 330R Silent Running case
· Disk 2 Samsung 120GB SSD
Reused Components
· OS Windows 7 professional, 64 bit
· Disk 2 Toshiba 320 GB 7,000rpm magnetic disk
· Disk 3 500 GB Toshiba, 7,000 rpm magnetic disk
· Disk 4 500 GB Western Digital 7,000 rmp magnetic disk
· Video Card Nvidea GT740 (DDR5)
· Monitor #1 AOC 32” primary monitor – 1920 x 1080
· Monitor #2 AOC 28” secondary monitor – 1920 x 1080
Selection
This actually took a lot longer than anticipated though – There were so many options available via Scan, Amazon, Novatech etc… that each needed a comparator against the others. The components were eventually purchased as a bundle via Amazon (See link at the end) – I could have saved money by buying all the components individually, but given that I would have wanted to soak test them, and if anything was wrong or damaged, would have had to wait for replacements, I took the easy way out and looked for a barebones kit. I used about 5 different “vendors” to get costs and specs before settling on this one.
For:
· Decent chipset with only a little overclocking – leaving headroom for more OC if \ when I need it
· Decent amount of memory for what I initially needed– can expand if needed later (2 spare slots)
· Decent motherboard - but I was very tempted for a RoG based Mobo, but couldn’t justify the need, even to myself.
Against:
· Aircooled rather than water cooled – I can buy a waterblock sometime in the future IF needed
· No case – planned to use my old case in the interim
What finally sealed it though was an unexpected “small token of our gratitude” from my employer that allowed me to buy this one, plus the extras I really needed, without really spending any of my money.
Installation and setup
Overall this was quite painless.
· Back up all my key data and configuration files across 2 of my disks, plus key ones backed up to my external 1TB disk just in case
· Deregister appropriate software from the old PC (such as Adobe Photoshop)
· Power down
· Unplug everything and remove peripherals \ disks \ cables
· Unscrew the mobo from the case
· Dry fit disks into old chassis
· Dry fit new mobo on chasis and identify cable routing
· Find out that it’s all a bit tight, but connect everything anyway
· Check all cables, power, cabling
· Cross fingers
· Power up.
· Went through POST straight away – No issues, everything working as it should
· Start worrying that I have forgotten something
· Start worrying that I have forgotten something important
· Go through the ASUS BIOS screens - initial, then advanced settings
o Disks – All identified
o Memory – All 16 GB present and correct
o Motherboard – Yep – Asus Z-97 pro
o CPU – As expected – i7, 4 GHz
o Temperature – Creeping up a bit…
· Still worry I have forgotten something
· Identify and confirm primary Disk
· Exit POST – Keep all settings at default for now
· Cross fingers
· Windows OS recognised – Booting into OS
· Wait
· Welcome to Windows – Please sign in…
· Ahh… now I’m happy
o Unrecognised components
o Missing drivers
o Missing components….
Post boot up Process
It was genuinely that easy – System seemed to be as advertised and it booted into the OS, but as I sort of expected, there were so many differences between my old CPU \ Chipset and the new, that nothing was really worth salvaging or fixing. I didn’t really want to bodge the system by downloading more drivers on top of the old ones, plus I didn’t like the new kit in the old case – Cables were stretched and I wasn’t too happy with it.
The Plan
· Buy a new case
· Rehome the components in the new case
· Reformat the primary disk and reinstall Windows
Plan B
A quick trip to Maplins saw me return with a Corsair 330R Silent running case. Sometimes I need to work early in the morning to build and manage servers – The rest of the family don’t like the PC running at 5am in the morning – They say it the noise from the fans keeps them awake…
The Corsair Case came with lots of padding on all sides, and underneath, while still allowing airflow through its 2 inbuilt 1200mm fans. I purchased an additional 1200mm fan (low RPM, high throughput) to connect to the top of the case as well.
The 2nd fitting
· Disconnect all components from the old case
· Fit the disk into the new case, making use of the double sided removable disk cradle – Nice
· Fit the additional fan to the case roof – route connectors behind the case
· Dry fit the new motherboard
· Find out the case didn’t have all the brass screw headers fitted
· Find the missing ones in the dummy “disk box” in one of the disk cradles
· Fit the missing mobo headers to the case
· Dry fit the motherboard – Perfect
· Route the cables behind the mobo chassis frame
· Route the SATA cables from the disk chassis to the mobo
· Grin as everything fits neatly – Lots of airflow at the bottom to the PSU
· Grin as no cables* dangling across the mobo
· Grin as the disks slot in and out of the chassis with no screws, just pins holding them
· Stop grinning as my son asks what I’m giggling about…
· Remove original OS disk, and promote the SSD to the boot disk
The 2nd boot up
· Again, all powered up first time, and all disks recognized
o A little faffing as I found I swapped 2 disks around, but all good.
· Temperature running noticeably cooler with 3 external fans + CPU fan all running well
The OS Reinstall
This went ahead with very little issue. Yes, on reinstall I used my old OS install disk, and Yes, the system recognized that this was a re-install. I followed instructions to confirm that this was the only PC with the OS on (my old one WAS practically unusable due to dodgy motherboard, sparks, and occasional leak of ozone as something fried…). Reregistering went ahead with no issues.
The Post Rebuild Issues
And it was at this point that I found out that some key files were not backed up… Nothing that could not be rebuilt or recovered from old backups but would have been useful there and then.
Other minor issue-ettes
· Fitting the case back panel – A little tough as I had routed some cables round the back and some of the disk connectors used 90 degree angles and flat cables, making the back panel slots a little hard to find. All fitted ok with a little tender pressing.
· Audio cable not fully plugged in
· Case a little bit too big to fit under the desk without a little cajoling – Fits, but a little tight.
· Numerous versions of key drivers available – Took a few hours to get the correct combination – See below
· Front USB 3 ports – Only 1 works with my gaming headset – No audoo available through the 2nd port – This is a manufacturing issue, but as I lost the receipt, and the other port works with audio, I have left it as is.
The Rebuid Joy
Once the OS was installed, I then installed all the rest of the drivers from the enclosed motherboard CD. Almost all had updates available from the internet, so it was a case of installing from CD first, then using the software to find newer versions, or manually checking the version on the disk then looking myself.
The reinstall of the drivers took the best part of an afternoon, but when done…
… It was worth it.
Using the ASUS Suite monitoring software, I could set up, control, and view the status of the key components.
· Temperature was a steady 54 – 58 degrees
· CPUs were just ticking over when nothing was running (seeing a single core registering 800 Mhz.
· When load was put on it (EG Boinc - run all the time), all 4 \ 8 cores sprung to life at up to 3.5 GHz
· Memory timings could be configured.
· Fan control could be set to auto, silent, Typhoon \ maximum
The machine has been able to run everything thrown at it, from reading reddit (/r/simulated of course), to running Visual Studio & SQLServer, to playing Elite Dangerous (and at least once with those and more applications running concurrently) with nary a sweat… and all almost silently thanks to the case.
Acknowledgements and Links
The PC was purchased and assembled by myself as my own personal PC. No vendors or manufacturers had any input to the build and all kit was purchased by me at prevailing rates. Neither Fascinating Tech nor any other company had any input to the decision making or the reason to purchase the kit – My old PC was almost dead, and I needed a new one.
Wayne also recently bought a new phone and thinks you should all know about it
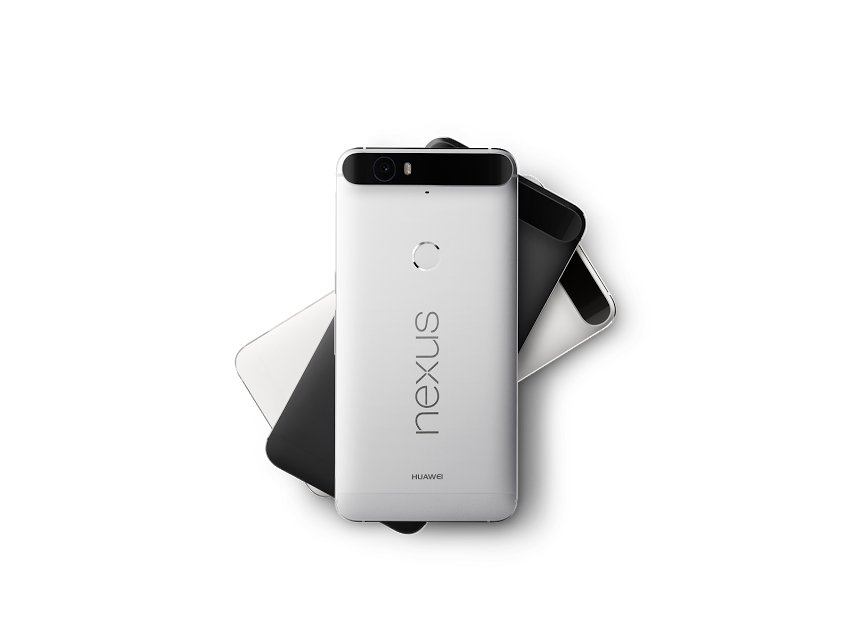
Google Nexus 6P
I finally ordered a phone before it was released. I got so fed up with bloatware and “suppliers recommended add-ons and helpers” that I wanted to get a phone that supposedly did what it promised on the tin. Being a Nexus 10 (tablet) owner for 2 years, and very being very pleased with the functions, form, and feel – I took a risk and ordered the new Nexus 6P.
I love it.
It’s a big beast, very noticeable bigger than my previous Galaxy 4, but still immensely accessible and usable. Some functions take a bit of a thumb stretch if being used with one hand (such as eating cereal \ toast at breakfast and wanting to swap to a different news supplier on the “UK and World News” app), but the response is immediate.
This review is not going to focus on the technical aspects of the phone – Other reviews have done this and to much more depth than I would want to go into. Instead, this is just an end-users review
Looks
It is big, glossy, and shiny. The glass goes almost to the edge of the display, with a vey small border on the left and right sides. The top earpiece and bottom mouthpiece look similar – just a 1 inch groove, with just a led on the top bezel betraying which end is up.
The two buttons on the right hand side control the power and the volume (annoyingly in reverse positions compared to my work phone) and are easily accessible.
The USB charging slot at the bottom is easy to access, and being of the new format allows the connector to be inserted in any orientation – No more fumbling for which end faces up.
The back of the phone is smooth and has the Nexus name, and Huawei, printed across it. The fingerprint reader is a slight recess above the logo and is in a natural position to allow your index finger to reach.
The back camera is at the top of the device (as expected) and does bulge out slightly. Some reviews have called it ugly, but it looks absolutely fine to me.
There appears to be no wasted space on the device – It IS a big device, but it fits my hands nicely, and feels nice to use.
The only change I would like to see is a textured back to assist grip.
Buttons
My device has a passcode attached to it and is also unlockable with a fingerprint.
The fingerprint reader has worked flawlessly since I got the device. A few seconds are spent registering a finger in a few orientations, then it’s ready to use. I have unlocked the device with my finger placed on the reader when the phone has been in landscape and portrait orientation (and once upside down I think), and it’s been read fine.
By default, every now and then the device also prompts for the passcode once the fingerprint has been read – I applaud this additional check; It’s not a burden and provides some additional feedback that the phone takes your security seriously.
No – I am not going to enter a discussion about how much information Google has on me – I entered an agreement when I signed up for their services, and I am comfortable that the information held is appropriately stored and used – ‘nuff said.
The volume buttons work well in any orientation with an audible click when used. Actions are smooth and “definite”.
The power button is easily accessible and provides a similar audible click when used.
To help protect the phone a little from knocks and drops, I purchased a case for it from Amazon \ BCSUK
· MoKo [Anti Drop] Hard Polycarbonate + Silicone Protector Bumper Cover in Grey
The soft silicone sleeve wraps around the back and sides of the phone, with cutouts leaving the fingerprint reader, camera (and IR sensor), and USB charging port exposed, while the hard polycarbonate “wrap” then covers ¾ of this, again leaving the fingerprint hole exposed.
The silicone wrap interacts with the power and volume buttons fine – No slipping or mis-reading, and although the whole case adds a couple of millimeters to the whole depth of the phone, all functions are still accessible while giving a bit more protection from drops, knocks, and spills.
The Screen
The screen is very bright and crisp.
Colours are vibrant and do not bleed into each other (useful for someone who does photography for a hobby). On some of my earlier phones, there was a noticeable blurring of colours on some complex images and also some artifacts when the image was displayed full screen. Not so on the Nexus; Images are displayed cleanly and clearly, regardless of the zoom. I am aware that some of the issue may be down to the software or compression of the images, but I prefer displaying the same image from the same source on my Nexus 6 compared to my old Galaxy S4.
Text is readable even with small font sizes, again without any blurring or merged kerning. Web pages, and applications show text clearly with no ghosting or “anti-aliasing artifacts” in evidence.
Video plays smoothly – Although the processor \ cpu on the phone has to take a lot of the credit, the screen quality helps a lot. Video plays smoothly with no ghosting or artifacts in evidence.
Audio
I am not an audiophile so cannot comment if the Nexus is generally better \ worse than other devices, but the audio is good enough for my needs – Akira Soundtrack plays nicely (using speakers or headphones) and other sounds are clean –no hissing or other noises even at high volume.
When using the phone, voices are clear (depending on the line quality), and the volume buttons do make a noticeable difference at each press. (My Galaxy 4 seemed to have levels 1-6 = almost mute, 7 = Ok, 8-10 almost deafening).
Charging
The Nexus 6 comes with a long USB-C cable and plug, plus a shorter USB-B to USB-C cable for connecting to another device (such as a PC \ Laptop).
I didn’t think the USB-C would be so useful but I didn’t realise how often I spent fumbling with the old USB-B type cables to get the plug in the right way up until I started using this new format.
The connector plugs in with a satisfying “thunk” whatever way you plug it in.
When using the Mains Charger, the phone displays “rapid charge” and gives an indicator of time to reach full charge – It. Is. Quick. From almost empty to a full charge takes ~ 1 hour. Your mileage may vary. When connected to a PC, USB charging is appreciatively slower.
Power Usage
I am very impressed. The Nexus 6P comes with Android Lollypop and with it improved power consumption and power-saving. My Galaxy S4 needed a recharge every day, even after moderate usage. I am charging my Nexus 6P every 3 or 4 days with similar usage. Note, I may be letting my Nexus drain further than my old Galaxy so comparisons need to be taken with a pinch of salt – But with that being said, I am noticing much better power usage with the Nexus.
With Lollypop, applications that are not actively is use can drop down the power usage ranks, so they don’t take as much juice as they would under KitKat or earlier versions – This seems to work a charm.
In Car
My car has a 500 milliamp USB port in the dashboard. When driving to Glasgow (~400 miles) I found that the Google Maps application (& GPS) was draining the power more quickly than the USB could charge the device – Result is the phone still draining power while in use, albeit more slowly.
I purchased a 12v “car-cigarette-lighter-socket’ to USB power converter, and plugged my Nexus 6 into that. The Connector provides a steady 2amp output which he Nexus seemed ok with, and I couldn’t see much, if any, drain while driving to Glasgow today.
Applications and in use
Everything seems just that bit more quicker and slicker. It’s a mix of Lollypop and the CPU, but everything is a bit snappier, more responsive, and more fluid. Applications open quicker and respond to touches and requests that little bit more quickly (when compared to Galaxy S4 and Nokia Lumia (Work Phone)). Applications also close when you ask them, instead of hanging on a couple more seconds (at least from my viewpoint).
Touches also seem a little more accurate – Using the Galaxy, the UK News App (also shows The Register) sometimes didn’t take “open” requests on the first try. On the Nexus, everything was taken first time and immediately – It could be due to age of the old phone, and improvements on the newer devices screen, but overall it’s noticeably better.
Moving things around on the home screens feels better with the icons snapping into place, and “pulling” away with a little bounce when dragged. It’s a joy to use.
Applications
The stock set of applications are all Google based – No additional ones unless I choose to install them.
All are functional, and most of them are as good as I need – I do like Inbox rather than Gmail, even though it lacks some facilities, but overall it does what I want.
Settings
Like the list of applications, there are a known set of settings I can customize – No need to go into a vendors app to set additional settings (such as input type \ keyboard). Lollypop also comes with additional improvements on some of the settings and displays – Battery usage displays a bit more information of the applications drawing power for example; In addition, there is now a battery optimization setting that you can interact with to set battery usage per-application… all welcome.
Google and Customisation
Going back to the key reason for picking the Nexus 6P – I was fed up with the main phone vendors adding bloatware and their “customized” versions of applications for my convenience. Some were genuinely useful, but the majority were just a waste of cpu cycles and screen space – The worst were the ones that you could not uninstall – I agree, some of those applications may not actually be doing anything when not is use, but If I want to delete them, I should be able to – “Samsung \ Yahoo Stocks – I am pointing at you specifically…”; There is only 1 calendar – Google Calendar – Not a Samsung version too. The Nexus has just a core set of Google applications, all of which I can remove (I believe) if I wanted.
Overall
I am genuinely pleased with this purchase – It’s a nice phone. It does what I want it to do. It does not have unwanted applications (or applications that I cannot remove).
There may be nicer looking phones (but I DO like the looks of this this one), but as whole, this is a brilliant piece of kit… until the next one comes out.
Acknowledgements and Notes
This is a review of my own phone. My previous contract had expired 4 months previously and I wanted a new phone. Neither Google, Fascinating Tech, nor any other company were involved in the decision to purchase this phone.
Nexus 6P silicone & polycarbonate case:
My phone is using the Fast EE+ network so any reference to timings for accessing the internet using radio signals in this review is to take this in consideration.
Next Wayne takes a look at his favourite semi-Smart and very clever watch.
Casio Edifice ECB500D
It’s been nearly a little over 18 months since I bought (and reviewed) my last watch – A Casio Edifice EMA-100D – It has served me well by keeping me on time for my appointments and telling me when to wake up (on the occasions I left my phone elsewhere). In that time its had its batteries replaced once, and been professionally cleaned twice. However, recently the digital display has started to become corrupted on all settings, and the hand and digital reset has failed to work. I have used that as an excuse to look for a successor.
The Casio Edifice ECB-500D-1AER is a smart looking and weighty watch. Carrying on a theme of smart yet simple functionality, It seemed an ideal replacement for my 18 month old Edifice EMA-100D which has started to play up a little. Its bluetooth functionality does make setting the time a little easier and doesn’t seem to affect the battery \ charge much. Being solar-powered should mean there will be no need to open the back to replace batteries, and although some documentation says the capacitor is good for ~12 years use, I can see myself replacing it in a couple of years time as newer, fresher models come out.
Details
· Model ECB-500D-1A
Key Points
· Power Casio “Tough Solar” – Solar Powered
· Power Saving Hands stop moving when watch is left in the dark for a while
· Bluetooth Connect to Android \ iOS – Sync time and control watch settings
· Airplane mode Available
· Waterproof 100 M
· World Time 40 cities
· Functions Stop watch, Countdown timer, Illuminator \ light
· Digital Display Some functions, date, time, countdown, timer
· Analog display 3 hand Local Time, 2 hand World time
· Weight ~195g
Casio Edifice Range
I like the Edifice range – There are about 40 currently on the Casio Website (Excluding the Red-Bull branded ones) with various capabilities and key selling points. Most tend to have 100M water resistance, some are battery powered, and others come with Casio’s “Tough Solar” solar powered functionality. Three of the latest watches also come with Bluetooth functionality that allow syncing between a compatible phone and the watch. Depending on the model, the Bluetooth functionality provides access to a number of the watches functions – All models can also signal the phone to make a sound in case you misplace it – A “find-my-phone” capability… Which could prove handy … if the phone is in Bluetooth range.
Casio Edifice ExB Range
There were three watches that caught my eye – All with Bluetooth functionality, but I wasn’t aware of that at the time. All had the aesthetics that I look for – Simple design, solid looking bezel and strap, easy to read hands – A “classic” look. It wasn’t until I started looking into the specifications that I noted that all three had Bluetooth capabilities to allow syncing with a phone.
· EQB510 - The “daddy” of the range. Blue flashes of colour on a steel and silver bezel.
· EQB500 – The sportsman – Green flashes of colour with 300 city times accessible.
· ECB500 – The quite one – Red flashes and with analogue and digital displays.
All three have model specific characteristics and designs.
The EQB510 had the most going on in its display – multiple displays, multiple indicators – The blue flashes of colour on the facia and the Bluetooth button looking quite nice.
The EQB500 also had a lot of displays on its facia, but laid out in a different configuration. The flashes were green on this model, and was almost the one I bought.
Casio ECB500
This is the model that I finally settled on. Its facia and bezel size is similar to that of the other two, but has less being presented to the user, having just the main hands, a smaller world time analog display to the left, and two small digital displays. Unlike my previous Casio, this one has a second hand but with no noticeable tic sound… and I have listened quite hard.
The facia is black, with the hours marked with bold silver bars – No numbers. The minute and hour hands are easily distinguishable and flashed in silver while the second hand is finished in orange \ red.
The smaller world time display has a silver minute hand and an orange \ red hour hand. In my current configuration, both times are set to London, so both displays show the same time.
There are also two small digital displays at the 12 and 6 o’clock positions.
Looks
The whole watch is a mix of bright and brushed silver and chrome. The fascia is a little larger than my previous Edifice at ~48mm and is also slightly heavier at ~195g
The front glass sits above the bezel by ~.1mm but is of toughened glass. I have knocked it a couple of times with no noticeable damage to either the glass or its surround.
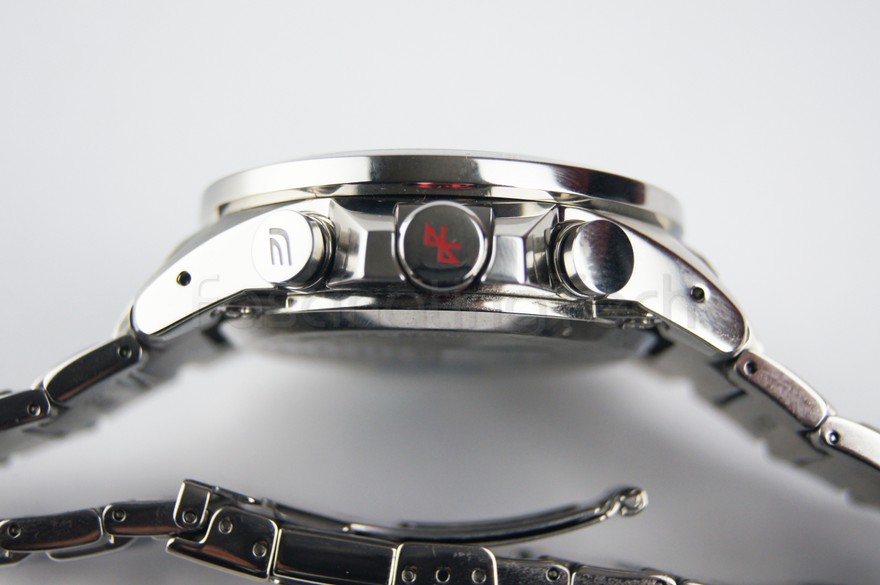
The buttons are quite chunky (which I like) with the “crown” protected by bars either side of it. The crown does not pull out, but acts as the Bluetooth connection button. It is flashed in red and has a red “Bluetooth” logo on its front.
The bracelet came with 19 links, and I had to remove one so that it fitted more snugly (I have large wrists). The links are three part, with the outside elements in slightly brushed silver, and the centre piece inb polished silver, matching the bezel and the case.
Unlike my previous Casio, this one does not have a rotating bezel – It is fixed, and is plain.
The 12 and 6 o’clock hour indicators are slightly larger than the other hour markers and have a brushed silver stripe in the middle.
There is a red-flashed Bluetooth “connecting” mark on the bezel between the 3 and 4 o’clock positions, an a Bluetooth “established” mark at between the 4 and 5 o’clock position.
When the Bluetooth functions are initiated or in progress, the red flashed second hand will point to one of these two marks.
The small analogue displays at 12 and 6 o’clock are just big enough to display the information they need to, and any long messages (such as selected city) scroll along the bottom display slowly enough to read.
The world time analogue display is again framed in silver and nestles between the 8 and 10 o’clock positions – The hands are easy to read and do not distract from the main time.
The Edifice logo and branding is on the fascia t the 3 o’clock position – Easily readable, but not distracting.
Functions \ buttons
The watch has 5 buttons.
· 10 o’clock – changes the digital displays from time to date
· 8 o’clock – Changes modes – Time, Stopwatch, Timer, Alarms, time
· 2 o’clock – Light
· 5 o’clock – Display time zone
· 3 o’clock – Enable Bluetooth functionality – Looks like the crown, but don’t pull it out.
Depending on the mode you are in, the buttons all have additional functions.
Functions \ Phone application
At the time of writing, the current Casio+ application is at version 2.2 and allows you to control various functions on the watch, including setting one of five alarms, resyncing the time (the phone being the master), or starting countdowns \ timers etc.
Pairing the watch to the phone took about 4 attempts – I had to allow my Nexus 6p to allow connections before it finally worked. Once done, a ½ second press on the ‘crown’ pairs my watch with the phone and automatically set the watches time and hands. As I am flying to Rome for a holiday shortly, clicking on the “world time” action on the phone will allow me to set the world time to Rome, while home time will also be shown.
I must remember to hold down the 8 o’clock button for 5 seconds to enable airplane mode before I fly out.
I have not tested any of the other functions yet, but those that I have all seem to work as expected.
The phone \ watch are also configured to set the correct time at 5am daily if Bluetooth on the watch is enabled.
Overall
Overall I am pretty pleased with the watch. It looks great, feels right, and keeps time well. The buttons are a little sensitive – bending the wrist back can trigger a button press – but respond well with audible feedback when pressed. The glass face is toughened, but sits almost flush with the bezel – Its been knocked once or twice already but no damage done. It would have been useful to have the bezel a bit higher to help protect against such knocks, but it’s not a major issue.
Acknowledgements
Like the previous Casio review, this was a review done on my own watch. Nothing in this review is due to requests by, or on behalf of Casio, Fascinating Tech, or any other company.
· I needed a new watch
· I like Casio Edifice as a brand
· I still cannot afford Breitling.
My thanks again to The Watch Shop in Reading – The manager there introduced me to this new range (when I asked him about new Edifices), and he explained some of the features and functions available on each of them. A very professional team who know their watches and are always willing to help.
Amazon and Lunar Pearls – While checking prices and support for the watch I found Lunar Pearls advertising the watch on Amazon for a little over 50% of the retail price. I checked around for reviews and also for news from other sites about Lunar Pearls and didn’t find anything worrying about them. I ordered the watch on a Sunday, and it was delivered on the following Friday from Germany. Very well packaged, all the correct paperwork, and nothing untoward on the watch (basically, not a fake). Very pleased with the time to delivery, and the care put on the packaging.
Finally Garry looks at an amazing Android Wear Watch
The Huawei Android Wear Watch
TrulyFascinating Award Winner
This is the best Android Wear watch we have ever tested. It is completely round, no Motorolla 360 flat tire bumps at the bottom of the screen here, and is a high resolution Amoled thing of beauty making watch faces seem crisp and putting others to shame. Battery life is good enough lasting just over a day and the device charges very quickly. The only small criticisms are the rather awkward magneticly attached charger puck and the price which is on the high side for this type of device.
There are several models available with different straps and finishes. Our base model was a stainless steel finish with a black leather strap and retails in the high two hundred pounds nearly three hundred.
However they do say you get what you pay for and what you are paying for here is a really good quality watch. Forget the fact this is a smartwatch for the moment, the build quality and style of this device is like any other really good watch. Perhaps not up there with some of the designer Swiss watches but certainly in my mind giving brands like Fossil a good run. Even the packaging oozes quality with the presentation box being just that a presentation.
This is something that is lot better shown than written about so hit up our video review after the specs.
Technical Specs
- Display:
- 1.4-inch full circle AMOLED display 400x400 screen resolution, 286 ppi
- OS:
- Android Wear
- Processor:
- 1.2 GHz Qualcomm® Snapdragon 400
- Memory:
- 4GB ROM; 512MB RAM
- Dimensions:
- Body: 42mm diameter x 11.3mm thin
Band: 180mm x 21mm - Weight:
- 60.5 g
- Compatibility:
- Android 4.3+ / iOS 8.2+*
- Battery:
- 300 maH; Up to 2 days**
- Sensors:
- Gyroscope, Accelerometer, Barometer, Heart Rate
- Connectivity:
- Bluetooth 4.1; WIFi
- Materials:
- Cold-Forged 316L Stainless Steel
Black Fine Leather
Sapphire Crystal - In The Box:
- AC adapter; Magnetic Charging Cradle; User Manual; Health and Safety